


Fun Easter activities for kids
 |
Easter garland craftThese pretty garlands are sure to enhance your Easter theme if you’re celebrating at home this weekend if you’re hosting for family and friends or you’re looking for a nice activity to do with the children this school holiday. Start by drawing Easter eggs or bunny shapes on some paper, use a cookie cutter or just draw them freehand if you don’t have one to hand. After drawing your shapes on the paper, using scissors, carefully cut them out. Once you have the shapes, it’s time to start decorating! When all the shapes have been decorated, you can use cute little pegs or a hole punch to add two holes at the top to hang them up. After pinning them to the string with pegs or making two holes and threadding the shapes onto some string, just hang straight on the wall! Kids will be amazed to see their creations, and all the lovely ooo’s and aaaa’s that will ensue. |
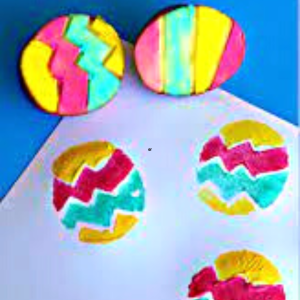
Potato masher printThis is such an easy craft idea to do with the children, and with little materials needed, kids will love transforming your left over potatoes into something they can dip paint into. Just be warned this could get messy! If you own a potato masher and were wondering what do with it, why not get started on making some beautiful printed Easter eggs? Let your creativity go wild by painting the potatoes with different colours and then press onto a sheet of paper. You can even add to this beautiful masterpiece, by adding green grass made of paper or card. Just cut little strips before crumpling it to make it more realistic before adding to your masterpiece! |
 |
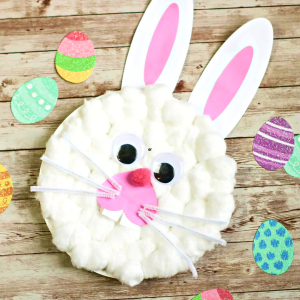 |
Paper plate bunnyUsing cotton wool balls to make a cute bunny face on a paper plate makes for a great sensory experience for the little ones. Start by covering the paper plate with craft glue and have your child glue down cotton wall balls on the plate. Make sure the entire plate is covered with cotton balls to create a fluffy bunny. Cut out bunny ears with white and pink construction paper. Glue the smaller pink ears over the larger white earpieces. Attach your ears to your paper plate with glue to secure it to the plate. Then add googly eyes, whiskers, and nose to your bunny. To create the whiskers, cut out two pipe cleaners into four small pieces each. You can use three pieces secured by twisting them together. Once finished, let the children find the right place to display their bunny face so everyone in the family can marvel at it! |
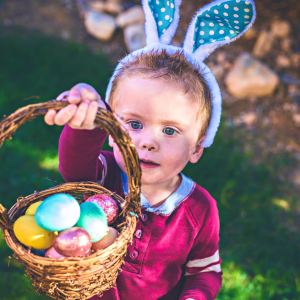
Easter egg huntEaster simply wouldn’t be Easter without an egg hunt! An Easter egg hunt is a great way to keep children entertained during the holidays. With fun rhymes, clues and a little imagination, watch the kids squeal with delight as you present them with some instructions and clues on how to uncover each step before being rewarded with a prize at the end of it. Some Easter egg hunt clues can be harder than others, while some can lead the children outside to mix up their play. Little and big ones can all join in to participate to help uncover each step, with anticipation and excitement building with every step. Why not throw the ultimate egg hunt this Easter Sunday and treat the children to some delicious chocolate goodies, which lets face it, is the best prize ever! |
 |
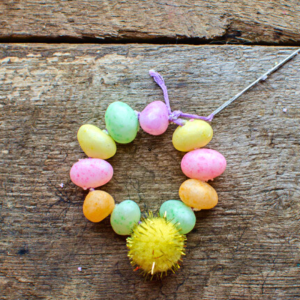 |
Easter jelly beans braceletsThese edible and colourful bracelets will be a big hit with kids this Easter, and couldn’t be simpler to make, if the beans last that long! First, using scissors, cut a length of thread two to three times longer than you want your jelly bean bracelet. This is so you’ll have a little extra thread to tie a knot at the end or if you want to make the bracelet a little stronger by doubling the thread up. Tie a knot at the end. Next, take your needle and press it into the jelly bean and slide it all the way through. Continue adding jelly beans, one by one, until it’s the length you want it. You can try stopping half-way through and adding an optional pom pom for decoration. Finally, once the jelly bean bracelet is how you want it, simply tie a knot at the end and put it on. Voila! |